Sunday, 21 April 2013

Zero no hero

Within the second year of University we had to look into and re-visit global issues throughout the fashion industry that were important to us as a group. The big issue for me and many others is the size zero body image, showcased throughout catwalks and many high level designer labels. 


Many images of  underweight and starving models can be found online and many are still strolling down some of the worlds highest designer runways. 


Many models who go into the industry with an average size figure and are proclaiming to change the size zero way can be seen in images slowly loosing weight to fit in with the industries ways. As seen in the images above of a healthy model who has gone from a normal healthy weight to a very unhealthy underweight frame. 
A very famous model that comes to mind is Crystal Renn, she began as a plus size model who was famous for flaunting her beautiful curves down the catwalk. 


Crystal has been photographed more recently looking rather thin and nothing like her fuller figured former self.

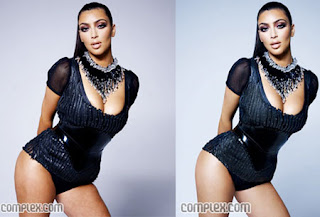
Another well known fact within fashion and body image seen in magazines is that models are air brushed so their bodies and complexions are perfect for advertising. This is a worrying problem for the younger generation who look to fashion magazines for inspiration, as they view skinny models or models that look a certain way as what 'beautiful' is, when in fact everyone is different and should be celebrated for their individuality. 


Gok Wan is famous for celebrating women's individuality and teaching people how to be proud of the skin their in.


We are the next generation and we need to stand up and take responsibility for these models who are walking down our runways. We don't want to be responsible for the unnecessary deaths of women who are often only thought of as human mannequins. 
Would you ignore this sight? or will you do the right thing and stand up against this cruelty?

IT'S YOUR CHOICE!


The Arizona hourglass

This project gave me the chance to write my own brief where I got the chance to incorporate my love for the 1950's silhouette with a forecasted trend for 2012/13 'aztec prints'.

I took pictures from high-street stores of aztec prints that could help inspire my own designs.


These are just a handfull of my print designs.
 

These are my final garment designs for the 'Arizona hourglass collection' . I have combined the 50's shape with tribal prints and am happy with the final outcome.


Rebello - Designing my own branded collection

For this project I had to design my own brand, labeling, logo, and garment collection.


This was a inspirational mood board.


These images were of label and logo development, I decided to use a skull design as it represents something I love within fashion design. The title Rebello is taken from the Latin meaning  'to fight back', this project was designed around tribal tattoos and from looking through history at the facts behind women having different rights to men, I decided the name 'Rebello' fitted my collection well.
My final label and logo.


This is my final range board for my final collection.


First steps baby-wear project

This project involved designing a baby-wear range for the company 'First steps baby-wear'. I decided to make a range using robots as my print inspiration.


This was my mood board for the project with inspirational images, my own photo-shop pictures and colour palette.


These are images of my final designs.


These images show bigger baby clothing packs with prints. I really enjoyed this project as it was something I hadn't done before, it was fun to design for kids and working on photo shop was quite new to me so was good to get to grips with it.


Friday, 19 April 2013

Maverick - Group project

For this group project I worked with Clarice and Amelia, our chosen maverick was Antoni Gaudi.
We made a mood board of inspirational Gaudi architecture and had to keep a journal of our work.
Each group got given a jacket pattern piece, ours was a front chest section which we began by dying the blue. 


We made our own fabric samples using mosaic inspiration.


This image was our group favorite and we chose to use this image to make a mosaic version on our pattern piece. Each group got given a jacket pattern piece, ours was a front chest section which we began by dying the blue. 


These images were taken while I was putting the design together, I used felt and fluffy balls for the top of the building.


Here I had added sequins and using a glue gun I glued on multi-coloured mosaic pieces .

This is the finished pattern which all three of us was very happy with, and agreed it was a good yet quite challenging experience working as a team.


Thursday, 18 April 2013

Room with a view

           This project was inspired by the (1985) film 'Room with a view'. I began by looking             
 at the fashion of the era and interior/antiques also. The antiques had beautiful patterns and designs which worked well to design with, I used these to create continuous patterns for wallpaper designs.


Poster and images from the film


These are black and white continuous pattern designs, designed for wallpaper.


These are final designs- using templated continuous pattern designs on layered paper


Shirt Manipulation Project

 
The shirt project brief was to take a plain white shirt and manipulate it using heavy metal as my inspiration, and metalics as my colour theme. I turned my shirt upside down and removed the sleeve sections.


 Side view-  I stitched a silver chain to the top of the armhole
 which when worn is draped over the arm.


 Front view- I used gold iron on studs which are on the bottom of the shirt
The overlapped sleeve section is embellished completely with metallic buttons and beads.


Back view- the back of my manipulated shirt started as a shirts centre front, so I took out
 the buttons and added an interfacing to thicken the 'now' centre back section so it could
support and hold the eyelets I added. I threaded ribbon through the eyelets and created
a corset style back. I also used iron on studs on the back.
 
Embellished section- This section was created using the shirt sleeves I removed
at the beginning of the manipulation. I stitched the two sleeve sections together and used
wadding and interfacing to create a thick and semi-stiffened over-the-shoulder section for
my shirt. I embellished this section completely using gold mosaic pieces, metalic buttons and beads.
It was a timely and tiring process, but it left the shirt with a striking and very unique look.